Most website scripts require you to have a database in order to store data (blog posts, user posts, comments, etc.) Here’s how to set up a database.
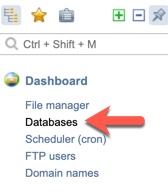
When logged in to ISPmanager, navigate to Dashboard > Databases.
Click “Add” at the top of the columns on the right.
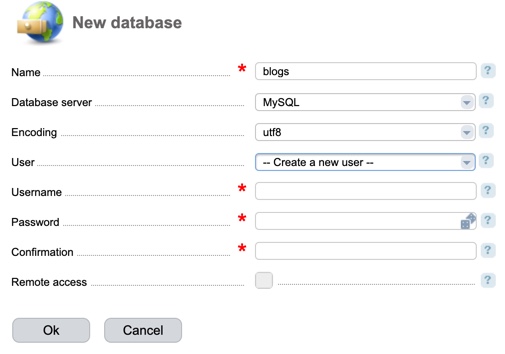
Fill in the database details. If you’ve created a user before, you can choose that user or create a new one. Don’t select “Remote Access.” Click “Ok” when done.
Keep a record of the database name, username and password as you’ll need those when installing scripts. The hostname is “localhost” for script installation.
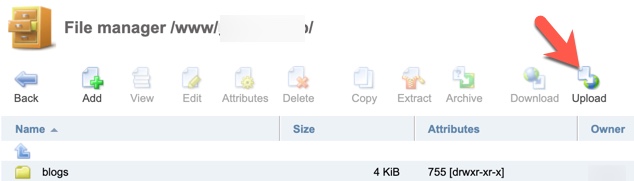
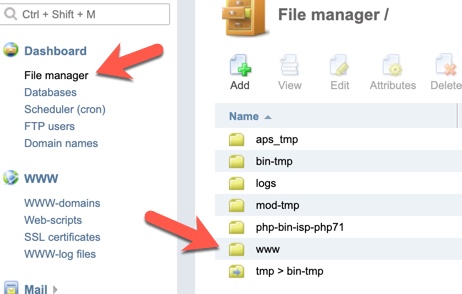
The file manager in ISPmanager can be used to upload, unzip/extract, delete, move and create files or folders. You’ll need to be logged into ISPmanager in order to do the following.
Navigate to Dashboard > File Manager
Uploading Files
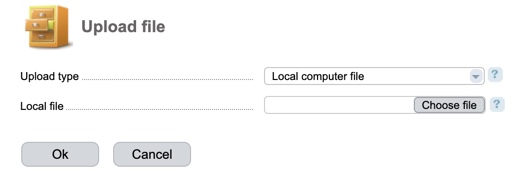
We recommend using FTP to upload files. However, if you just need to upload a small file, you can follow the below steps.
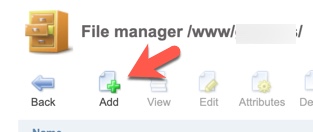
Navigate to the folder where you want to upload files. To find your website folder, it will be under the “www” directory and then the domain name.
Click the upload button which appears above the directory listing.
Choose the file type (from your computer or from a URL) and file. Click “Ok” when ready to upload.
Unzipping or Extracting Files
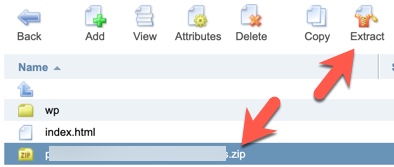
If you’ve uploaded a zip or other file, you can extract it easily in the file manager.
Click the compressed file and then click the Extract button that appears above the list of files.
Most modern browsers will block websites not using “HTTPS” security. Here’s how to set SSL to use HTTPS for your website.
Do not do this step until your domain has fully propagated.
When logged in to ISPmanager, navigate to www > www-domains.
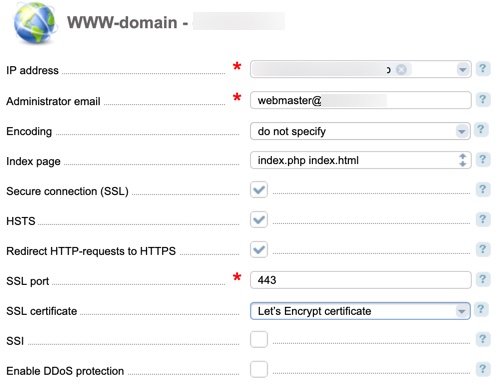
Select the domain that you want to enable SSL for and click Edit.
Select “Secure Connection (SSL)”, “Redirect HTTP-requests to HTTPS,” and choose the type of SSL certificate. We chose “Let’s Encrypt” for this tutorial and recommend that.
Click “Ok” when done.
If you chose Let’s Encrypt, you’ll be brought to a page for more details. If everything looks ok, click “Ok” or change what you want to change and then click “Ok.” Please note that this is not instant and can take 15-30 minutes to finish setting up on your site after activation.
If Your SSL Expires
Follow these steps if your SSL certificate expires. 1. Log in to ISPmanager. 2. From the menu go to “ww-domains” and click the “Edit” button. 3. Disable “SSL” and save. 4. From the menu go to “SSL Ceertificates.” 5. Select the certificate and click the “delete” button. 6. Click the “LetsEncrypt” button. 7. The fields are auto-filled, then click “OK”.
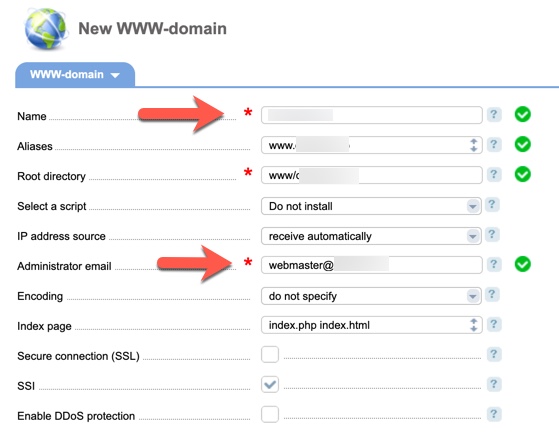
In order to have your website online, you’ll need to add it to the ISPmanager control panel.
Once logged in to the ISPmanager panel, navigate to “Sites” in the left menu.
At the top of the domain list on the right, click “Create Website.”
Enter your domain name and the rest of the fields will auto-populate after a few seconds. Be sure to enter the Administrator email if the one shown is not correct. Do not set the SSL at this step as the NS has to propagate first.Do not enable DDoS protection.
Set your DNS records. Propagation can take 24-48 hours depending on your domain registrar.
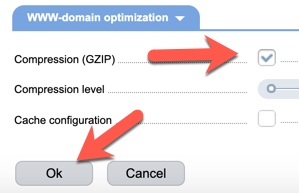
Enable Gzip at the bottom of the settings and click “Ok” when done.
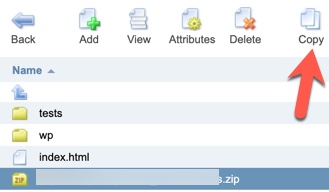
If you upload zip files and need to move the files after extraction, or just find that you need to move files around, here’s how.
Log into the ISPmanager control panel.
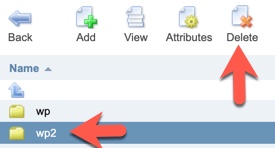
Navigate to the folder that has the file or folder that you want to move.
Select the file or folder and click “Copy” at the top of the page.
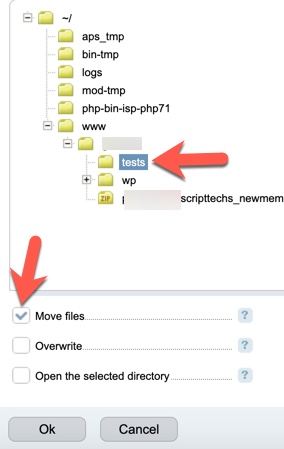
Select the folder you want to move the file(s)/folder(s) to and check the “Move Files” option. Click Ok to perform the move.
In the above image, “Overwrite” should be selected if you already have the same file(s) in the folder you are moving into as this will allow the newer files to overwrite the older files.
The option “Open the selected directory” is self-explanatory.
Your ISPmanager panel is where you’ll manage files, databases, FTP users, add a website, SSL, and lots more. If you’ve used Cpanel or Plesk before, you’ll find it similar to those.
Details to log into ISPmanager were sent to your email when you created the server.
You can reach the ISPmanager by typing one of the following in the browser address bar:
http://your_server_ip:1500 Replace “your_server_ip” with your actual server ip address or just click the link in the email.
or
http://yourhostname.yourdomain.com:1500 Replace “yourhostname.yourdomain.com” with your own hostname and domain.
Note: You need to have your hostname DNS record set to the server IP in order to use it for the URL.
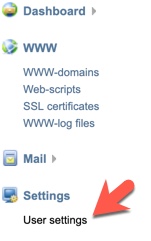
Changing Panel Settings If you want to change the language, password, username or other user settings for the panel follow these steps:
Navigate to Settings > User settings
On the right will be all of the settings available. Change what you want and click “Ok” at the bottom of the page.
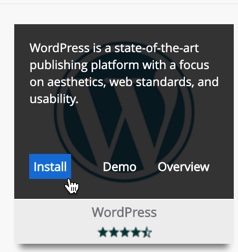
3. You’ll be brought to the Softaculous page that lists all of the available software that you can install.
4. Choose the software you want to install. For this tutorial, we’ll install WordPress.
5. Hover the mouse over the WordPress icon and click “Install.”
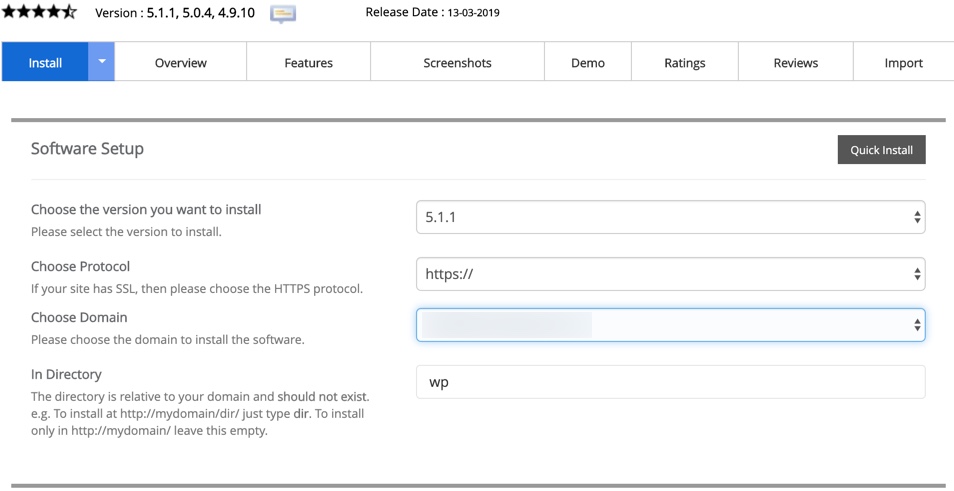
6. Choose the software setup you want. We recommend keeping it https secure. To install in the root (public_html) which is recommended, delete “wp” from the “In Directory” line, leaving it blank. When choosing the domain, be extra careful to choose the right one if you have more than one domain on the server.
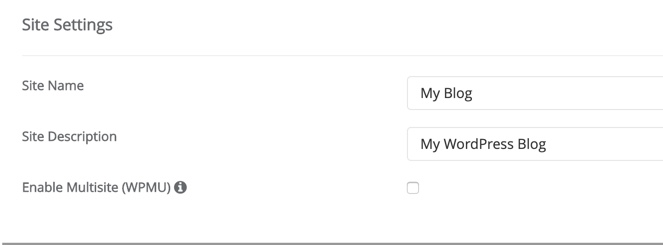
7. Enter your site name and description.
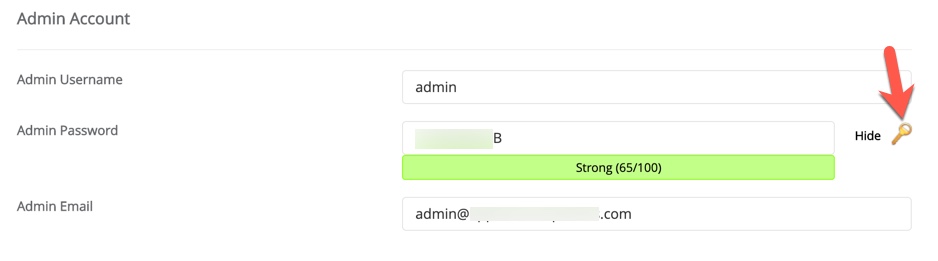
8. Add your admin details. We recommend clicking to generate a random password. Be sure to copy down the details.
9. Choose your language and select your plugins.
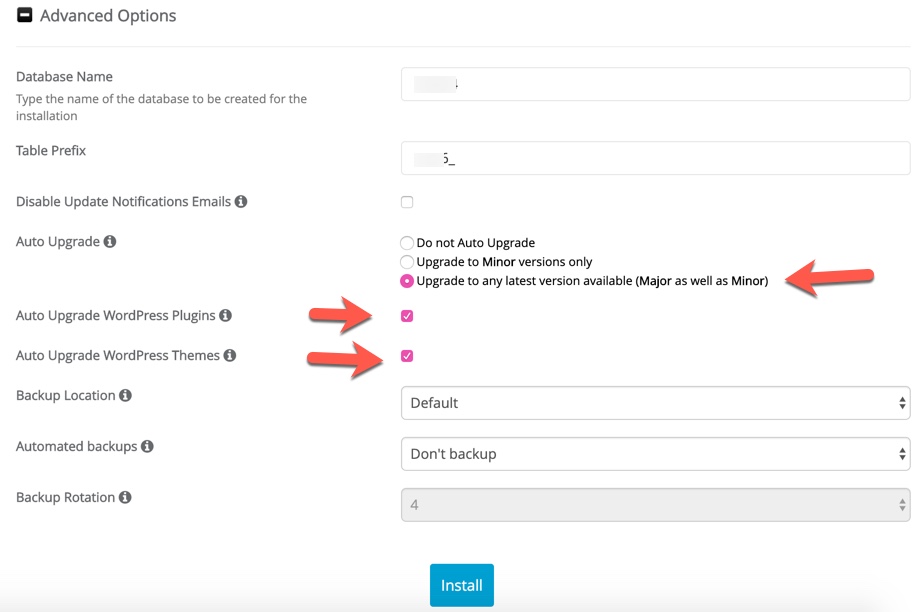
10. To setup the database with the install, click Advanced Options. You can select for WordPress, plugins and themes to automatically update if you want to save the hassle of upgrading each time there’s a release.
Do not select the automatic backups. You already have free offsite backups with BryZar hosting. Setting the backup setting here can cause issues with your server or corrupt backups.
Before clicking Install, be sure to fill in an email for the details to be sent.
After clicking Install, it will take a few minutes for the software to download to the server. You’ll see a success message once install completes.