ISPmanager Adding FTP Users

Your ISPmanager details were emailed to you when your server was created. That user and password can be used for FTP login as well, just follow this basic FTP guide.

However, if you would like to add more FTP users in order to give to developers or staff, here’s how to do that. This is best practice when having others work on your site as the main user has full server access.

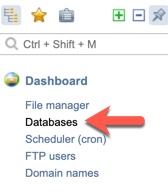
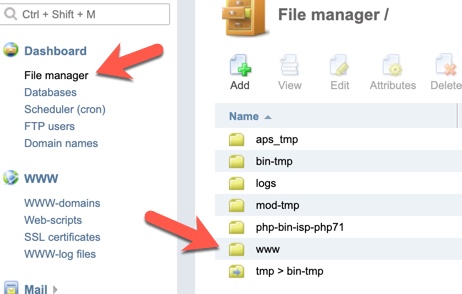
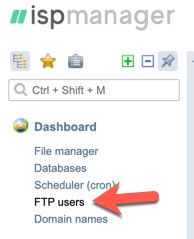
  1. Log into your ISPmanager and navigate to FTP Users.
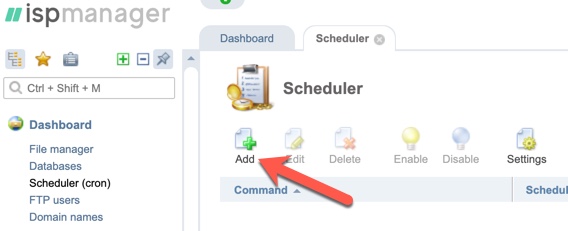
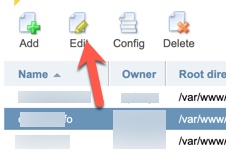
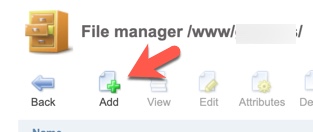
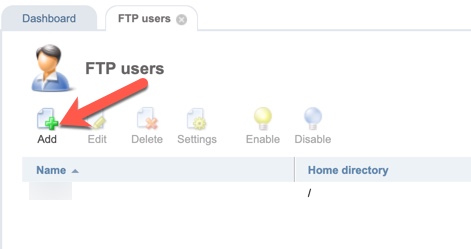
  2. Click “Add” at the top of the FTP user list.
    ISPmanager add user button
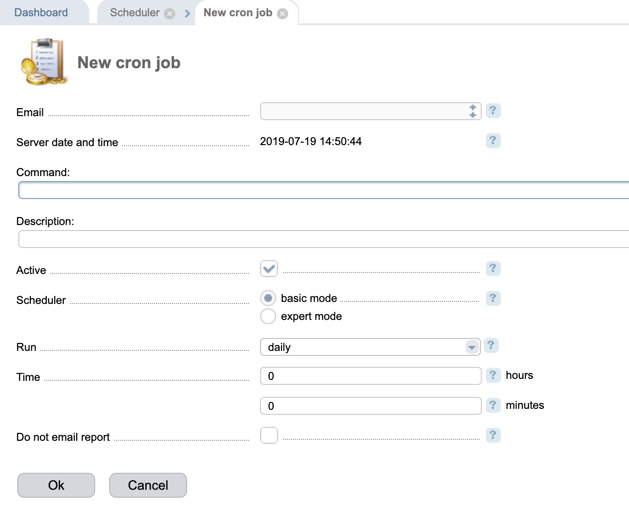
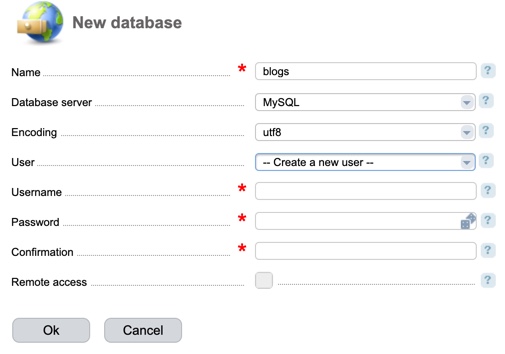
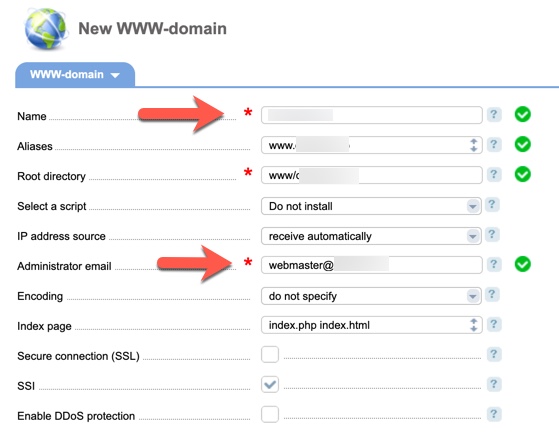
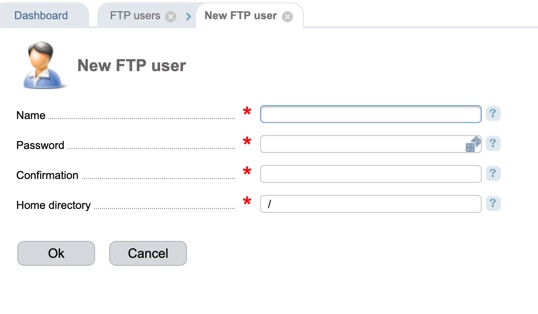
  3. Enter the FTP user name, password, confirm password, and the home directory that this user will have access to and click OK when done. Note that you can click the “Generate Password” button next to the question mark for the Password in order to have a more secure password.
    ISPmanager ftp user info

Suspending an FTP User

To suspend an FTP user, click the lightbulb to the right of the user.
ISPmanager suspend ftp user

Logging into PhpMyAdmin and Your Database in ISPmanager Control Panel

Once you’ve created a database, you may want to log into the database via PhpMyAdmin. You can easily do that in ISPmanager. Here’s how:

  1. When logged into ISPmanager, navigate to Dashboard > Databases.
    ISPmanager database menu
  2. Select the database that you want to log into and then click “Go.”
    ISPmanager open database
  3. You’ll now automatically be logged into the selected database.

If you prefer to log directly into your database in PhpMyAdmin, follow these steps:

  1. When you created the database, you would have received an email with the database details. In that email is a link to PhpMyAdmin which would be (yourserverIP)/phpmyadmin substituting “(yourserverIP)” with your own server’s IP.
  2. Once at PhpMyAdmin, log in with the same database user and password that you created when you made the database.

Note: Due to a bug in PhpMyAdmin and current PHP versions, you may see some warning notices when logged in to PhpMyAdmin. Once they have a fix for that, we’ll update it but for now please click “Ignore All” to not see the notices.

Scheduling a Cron in ISPmanager Control Panel

Here’s how to set up a Cron in ISPmanager Control Panel as many scripts require. You’ll need to be logged in to ISPmanager in order to do the following.

  1. Navigate to Dashboard > Scheduler (cron)
    ISPmanager cron menu
  2. Click “Add” at the top of the center column.
    ISPmanager add cron
  3. Fill in the fields for the cron. If you want a report sent, be sure to enter a good email address. This will send details of your cron jobs that you’ve added.
    ISPmanager cron fields
  4. The command would be whatever your script needs. You can get this from your script developer.
  5. Description is optional but helps you to know what this cron does in case you have several crons.
  6. You can use either Basic or Expert mode but if using Expert mode, you will need more details filled in. Only use that if you are familiar with setting up crons.
  7. The Run and Time would have been given by the script developer. Check with them if you don’t know.
  8. Click Ok when done.

Adding a Database in ISPmanager Control Panel

Most website scripts require you to have a database in order to store data (blog posts, user posts, comments, etc.) Here’s how to set up a database.

  1. When logged in to ISPmanager, navigate to Dashboard > Databases.
    ISPmanager database menu
  2. Click “Add” at the top of the columns on the right.
  3. Fill in the database details. If you’ve created a user before, you can choose that user or create a new one. Don’t select “Remote Access.” Click “Ok” when done.
    ISPmanager database details
  4. Keep a record of the database name, username and password as you’ll need those when installing scripts. The hostname is “localhost” for script installation.

Disabling Open_basedir in ISPmanager Control Panel

Some scripts require open_basedir to be disabled. Here’s how:

  1. Log into your ISPmanager control panel as “root” and navigate to Domains > WWW-domains
    ISPManager Domain Menu
  2. Select the domain you want and click Edit at the top of the page.
    ISPmanager edit domain
  3. Scroll down to the section “Additional Features and uncheck “Use open_basedir” and click Ok.
    ISPmanager disable openbase

Upload or Extract Files with ISPmanager Control Panel

The file manager in ISPmanager can be used to upload, unzip/extract, delete, move and create files or folders. You’ll need to be logged into ISPmanager in order to do the following.

  • Navigate to Dashboard > File Manager
Uploading Files

We recommend using FTP to upload files. However, if you just need to upload a small file, you can follow the below steps.

  1. Navigate to the folder where you want to upload files. To find your website folder, it will be under the “www” directory and then the domain name.
  2. Click the upload button which appears above the directory listing.
    ISPmanager Upload File
  3. Choose the file type (from your computer or from a URL) and file. Click “Ok” when ready to upload.
    ISPmanager choose file
Unzipping or Extracting Files

If you’ve uploaded a zip or other file, you can extract it easily in the file manager.

Click the compressed file and then click the Extract button that appears above the list of files.
ISPmanager extract file

Enabling SSL in ISPmanager Control Panel

Most modern browsers will block websites not using “HTTPS” security. Here’s how to set SSL to use HTTPS for your website.

Do not do this step until your domain has fully propagated.

  1. When logged in to ISPmanager, navigate to www > www-domains.
    ISPManager Domain Menu
  2. Select the domain that you want to enable SSL for and click Edit.
    Edit domain ispmanager
  3. Select “Secure Connection (SSL)”, “Redirect HTTP-requests to HTTPS,” and choose the type of SSL certificate. We chose “Let’s Encrypt” for this tutorial and recommend that.
    ISPmanager enable ssl
  4. Click “Ok” when done.
  5. If you chose Let’s Encrypt, you’ll be brought to a page for more details. If everything looks ok, click “Ok” or change what you want to change and then click “Ok.” Please note that this is not instant and can take 15-30 minutes to finish setting up on your site after activation.

If Your SSL Expires

Follow these steps if your SSL certificate expires.
1. Log in to ISPmanager.
2. From the menu go to “ww-domains” and click the “Edit” button.
3. Disable “SSL” and save.
4. From the menu go to “SSL Ceertificates.”
5. Select the certificate and click the “delete” button.
6. Click the “LetsEncrypt” button.
7. The fields are auto-filled, then click “OK”.

Adding a Website in ISPmanager Control Panel

In order to have your website online, you’ll need to add it to the ISPmanager control panel.

  1. Once logged in to the ISPmanager panel, navigate to “Sites” in the left menu.
  2. At the top of the domain list on the right, click “Create Website.”
  3. Enter your domain name and the rest of the fields will auto-populate after a few seconds. Be sure to enter the Administrator email if the one shown is not correct. Do not set the SSL at this step as the NS has to propagate first. Do not enable DDoS protection.
    ISPmanager Add Domain
  4. Set your DNS records. Propagation can take 24-48 hours depending on your domain registrar.
  5. Enable Gzip at the bottom of the settings and click “Ok” when done.
    ISPmanager Gzip
  6. After propagation, you can enable SSL.

Moving Files or Folders in ISPmanager Control Panel

If you upload zip files and need to move the files after extraction, or just find that you need to move files around, here’s how.

Log into the ISPmanager control panel.

  1. Navigate to the folder that has the file or folder that you want to move.
  2. Select the file or folder and click “Copy” at the top of the page.
    Copy Files ISPmanager
  3. Select the folder you want to move the file(s)/folder(s) to and check the “Move Files” option. Click Ok to perform the move.
    Move files ISPmanager
    1. In the above image, “Overwrite” should be selected if you already have the same file(s) in the folder you are moving into as this will allow the newer files to overwrite the older files.
    2. The option “Open the selected directory” is self-explanatory.

Creating a Directory or Subdirectory in ISPmanager Control Panel

Creating directories or subdirectories is a simple process in ISPmanager.

Creating a Directory
  1. Once logged in to ISPmanager, navigate to Dashboard > File Manager.
  2. Open the “www” directory by double clicking on it. This is where your domain(s) will be found.
    ISPmanager file manager
  3. Open the domain in which you want to create a directory. For this tutorial, we’ll create a subdirectory for WordPress named “wp.”
  4. Click “Add” at the top of the columns.
    ISPmanager add folder
  5. For “Type” choose “Directory” and for “Name” we chose “wp” but you can choose the name you want and then click the “OK” button when done.
    ISPmanager directory name
Deleting a Directory

Select the directory you want to delete and click “Delete” at the top of the page.
ISPmanager delete directory

%d bloggers like this: