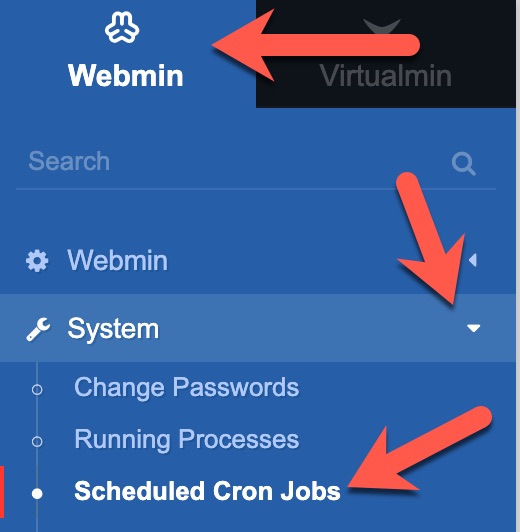
Here’s how to set up a Cron in Virtualmin Control Panel as many scripts require. Cron is a service for executing scheduled commands. You’ll need to be logged in to Virtualmin in order to do the following.
- Navigate to Webmin > System > Scheduled Cron Jobs.
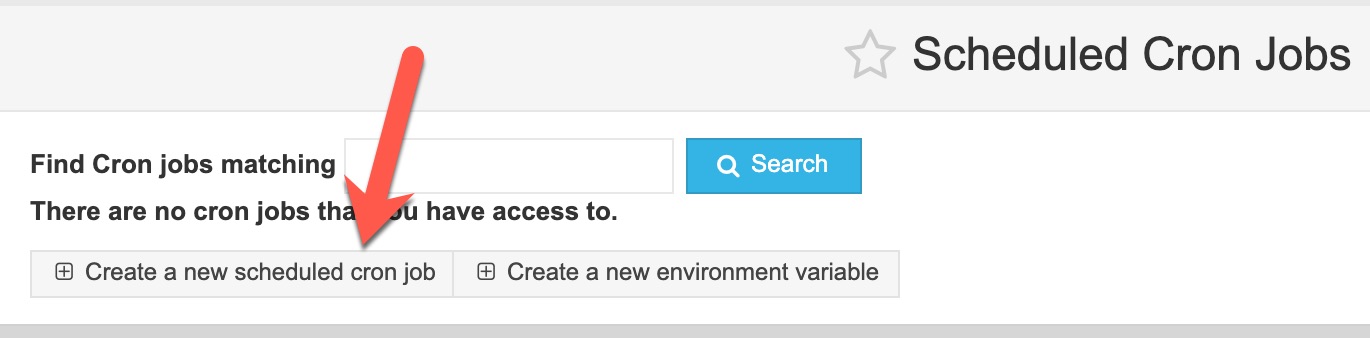
- Click “Create a new scheduled cron job”.
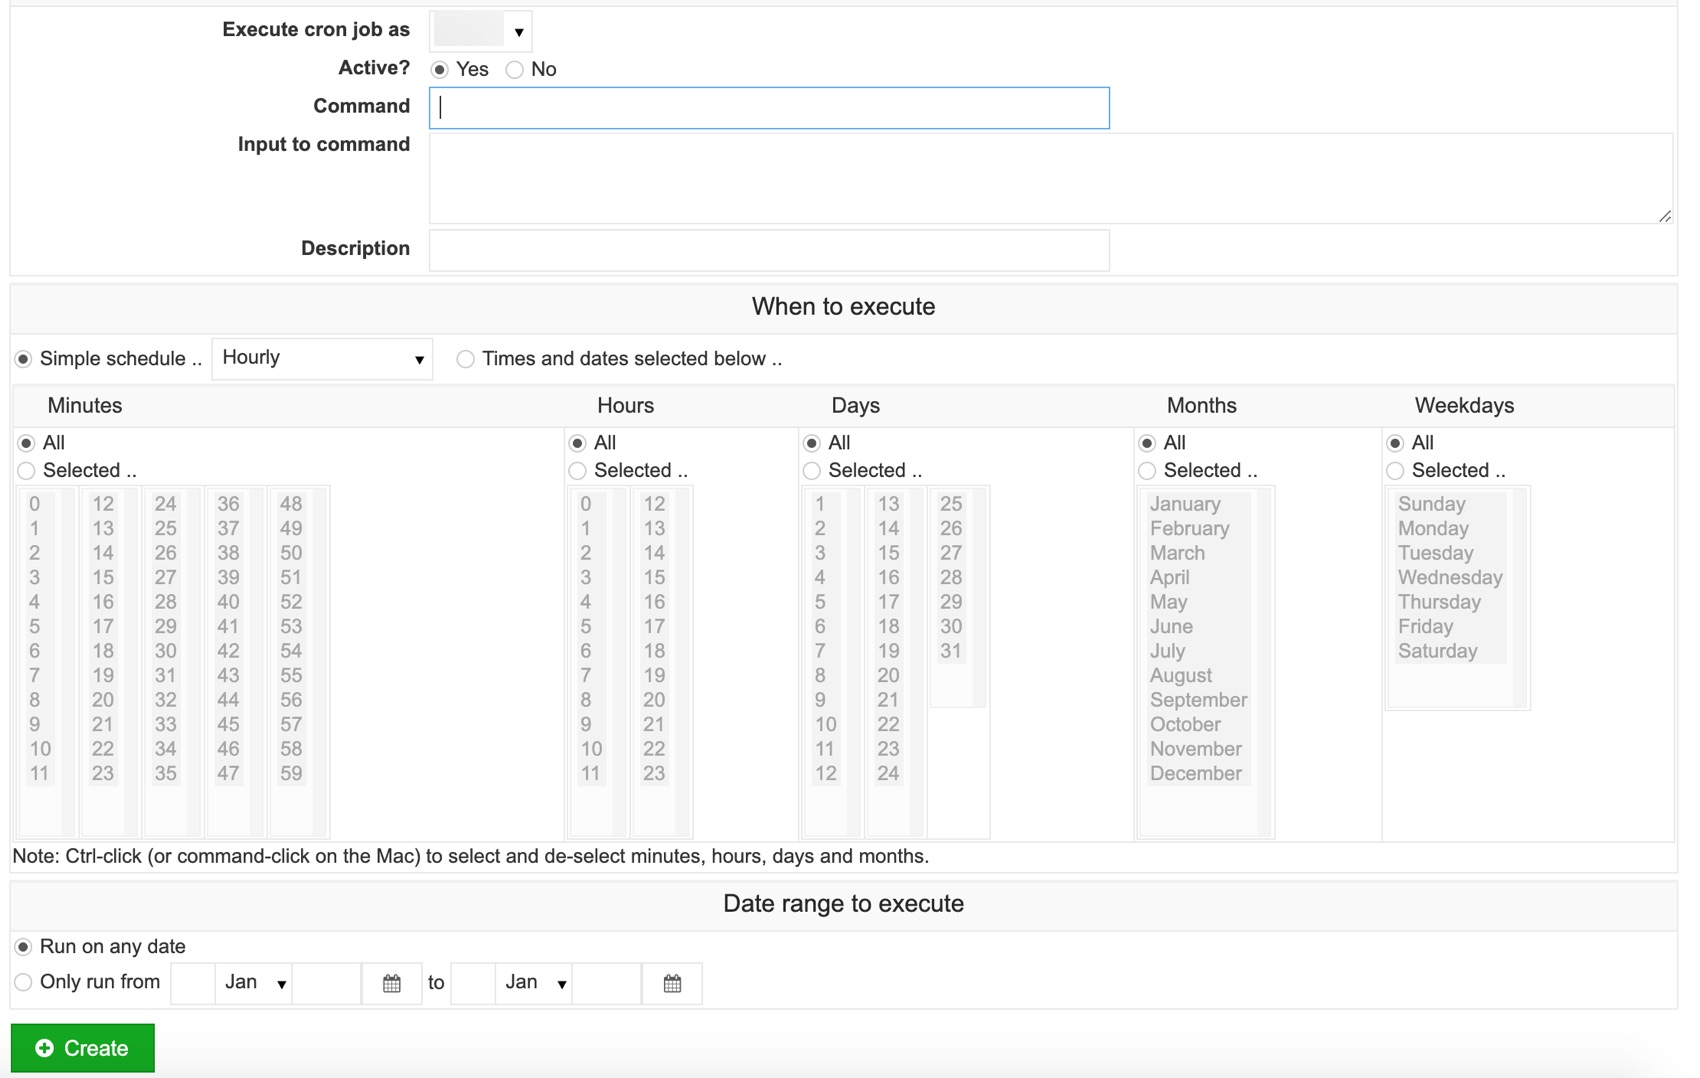
- Choose the user to run as for “Execute cron job as” . (See screenshot below for steps 3-6)
- Enter the command to run into the “Command” field. For example, if you want to receive a list of all running processes, enter
ps auxwfor the command. For more details on commands, please see your script developer. - Normally, you can skip “Input to command.” That’s only used if your command requires input after it begins running.
- Description is optional but helps you to know what this cron does in case you have several crons.
- Choose how frequently to run your command. By default, it will execute Hourly, meaning it will execute at the top of the hour, every hour. The Run and Time would have been given by the script developer. Check with them if you don’t know.
- To enable the Cron job, click “Create.”
Any output will be emailed to the root user.