If you need more options than general FTP offers, SCP programs are a good alternative for those not familiar with SSH. This tutorial will give a general idea of how to use SCP programs.
Before trying an SCP program, you’ll need to enable SSH for your user in Vesta panel:
- Login in to Vesta using the admin user.
- For the user you’ll want to use WinSCP or another program with, edit the user.

- Allow SSH Access = Bash
- Please ensure that you set the SSH Access to “nologin” once you are done each time with WinSCP or other programs. It is important for security.
WinSCP has a lot of power for you to use to move, unzip, upload, and delete files and folders. Due to that, you are advised to use caution when using it or you can delete your entire site. This tutorial will show you some basics but you assume all responsibility for results, both good and bad, by performing the steps herein. We advise you to read the documentation provided by WinSCP to become more familiar with all of its functions.
This tutorial will deal with SCP. You’ll use the user that you set up above with SSH = Bash access to log in via WinSCP. It would be a good idea to back up your site files before working with any SCP program if unfamiliar with the program.
Here are some custom commands at the WinSCP site. We added custom commands to our WinSCP for unzip and untar in order to work with those files. Just click Options > Preferences > Commands and add these:
- Description: UnTar
- Command: tar -xvf “!”
and for zip files
- Description: UnZip
- Command: unzip “!”
Upload Files
To upload a file, either drag the file from the list of files on your computer on the left to the folder on your server where you want it on the right.

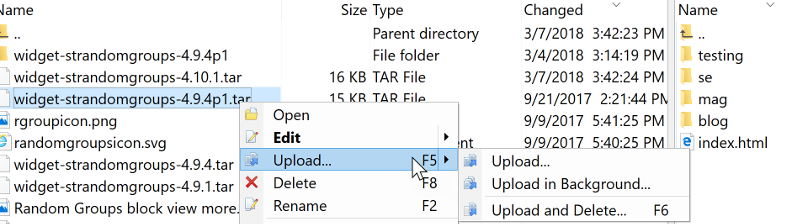
Or while in the folder that you want to upload into, right click the file on the left that you want to upload and choose Upload and select to Upload..
Create Folders
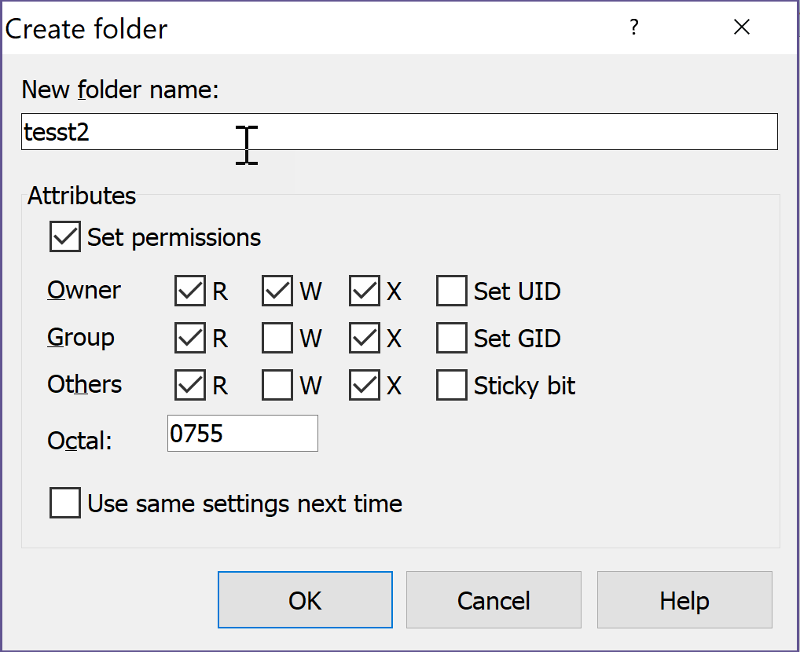
On the server (right side of the panel), right click and select New Directory. You’ll then have a popup to fill in the directory (folder) name and permissions. You can also set the owner/group if you need to.
Delete Files or Folders
Right click on the folder or file that you want to delete and choose “Delete.”
Move Files or Folders
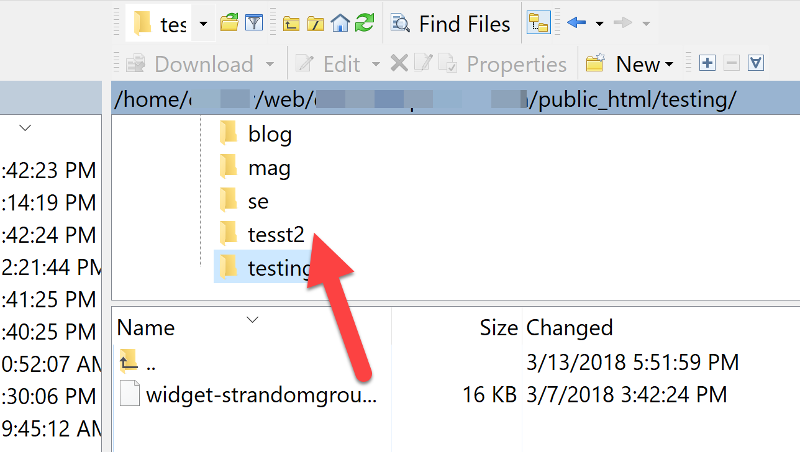
Drag and drop the folder from the bottom right panel to the top right panel into the folder you want it in. The below image shows moving a file from the “testing” folder into the “tesst2” folder.
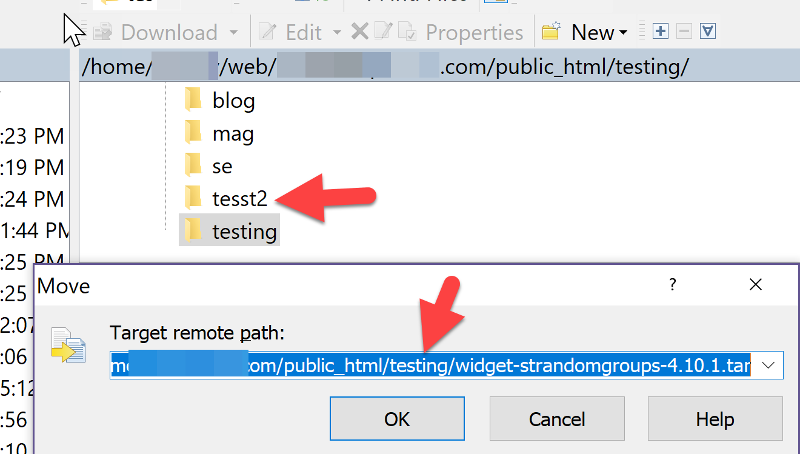
OR you can right click the folder or file to move and select “Move” and specify the full path to move it to. In the screenshot below, the popup box shows the current full path. We are moving from “testing” into “tesst2” so we would just change /testing/ to /tesst2/ in the url and leave all of the rest as it is.
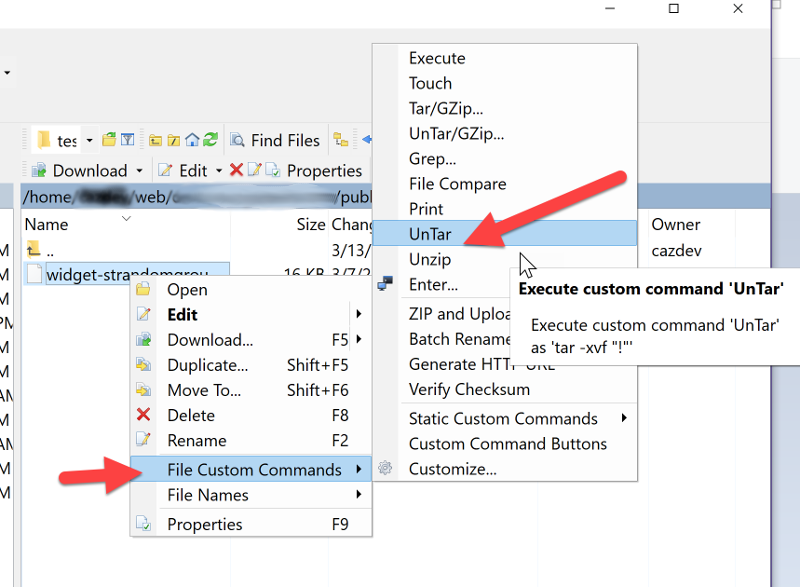
Extract or Compress Files or Folders
Right click on the file that you want to unzip or untar and choose “File Custom Commands”. Select Untar or Unzip depending on the file type. Note that you’ll need to add the commands shown above. To compress the files, you would instead choose to Tar/Gzip.
At this time WinSCP is the only one we’ve found, which works on Windows. If we find a program for Mac, we’ll update this document.
One thought on “Easy SSH with SCP Programs”
Comments are closed.