BryZar Premium DNS is a convenient way for you to manage DNS for your domain. If you need any help in setting up the DNS, please create a ticket and we’ll be happy to assist.
Steps to set up the DNS
You’ll need to be logged in to the DNS manager.
Step One
Add a Zone
- Click to register new zone

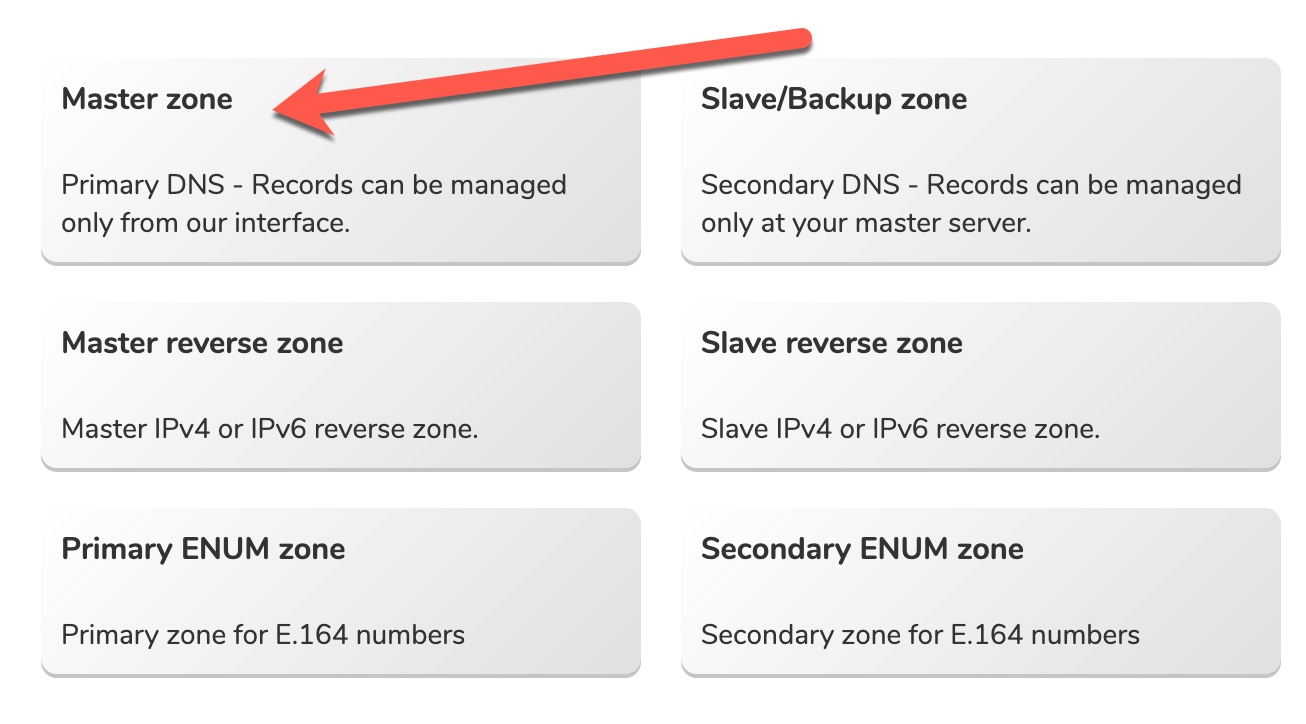
- Choose Master Zone
- Choose just the two NS, “pns41” and “pns42” , as seen below.
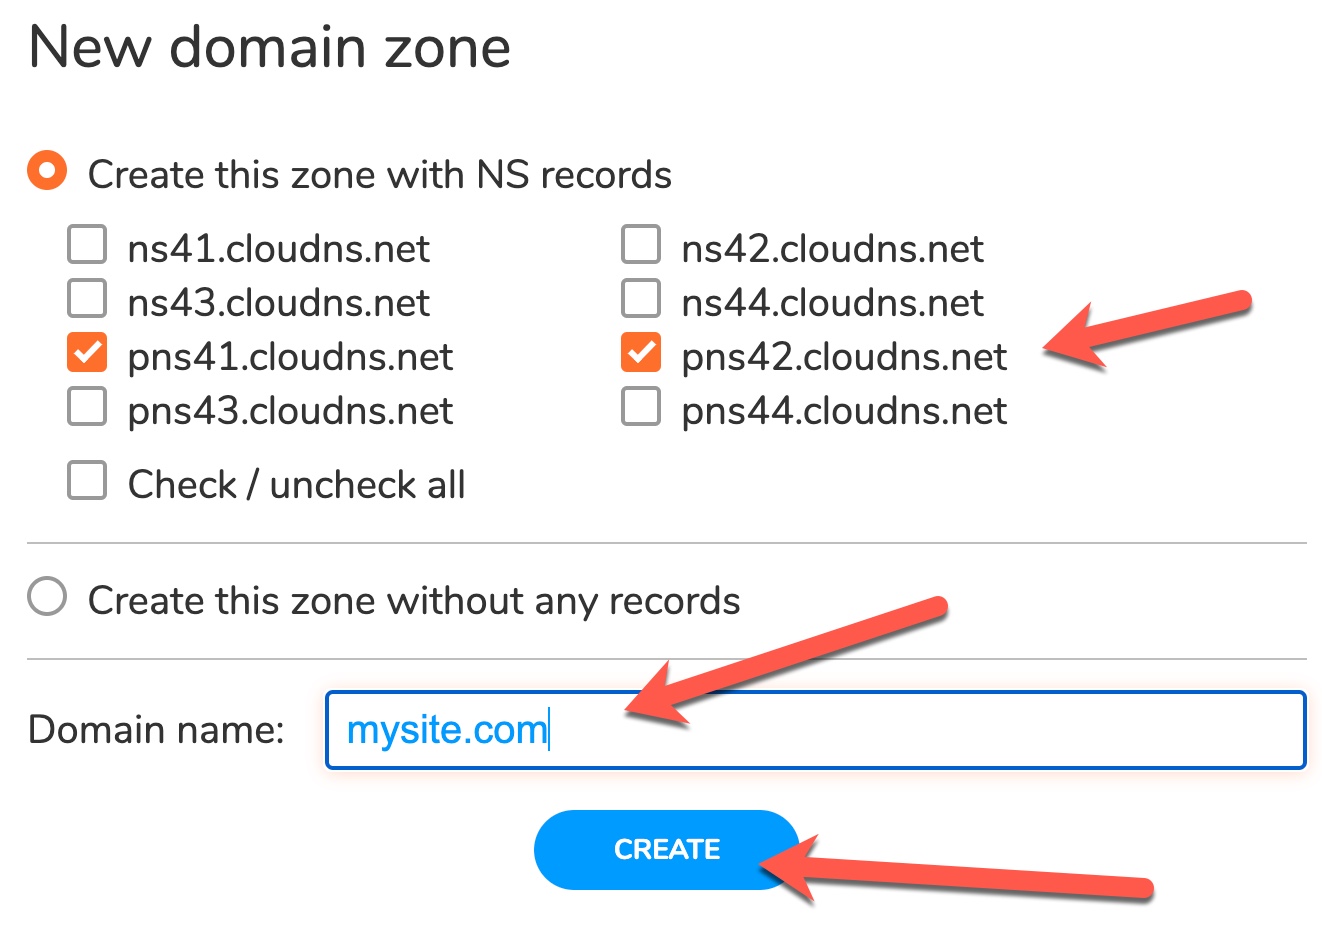
- Add your domain and click Create as seen above.
- After adding the domain in the DNS you will need to change nameservers at your domain registrar to the nameservers you have selected.
eg.
pns41.yournameserver.com
pns42.yournameserver.com
Step Two
Add “A” Records
- Add the “A” records by clicking “A” at the top and selecting to Add New Record.
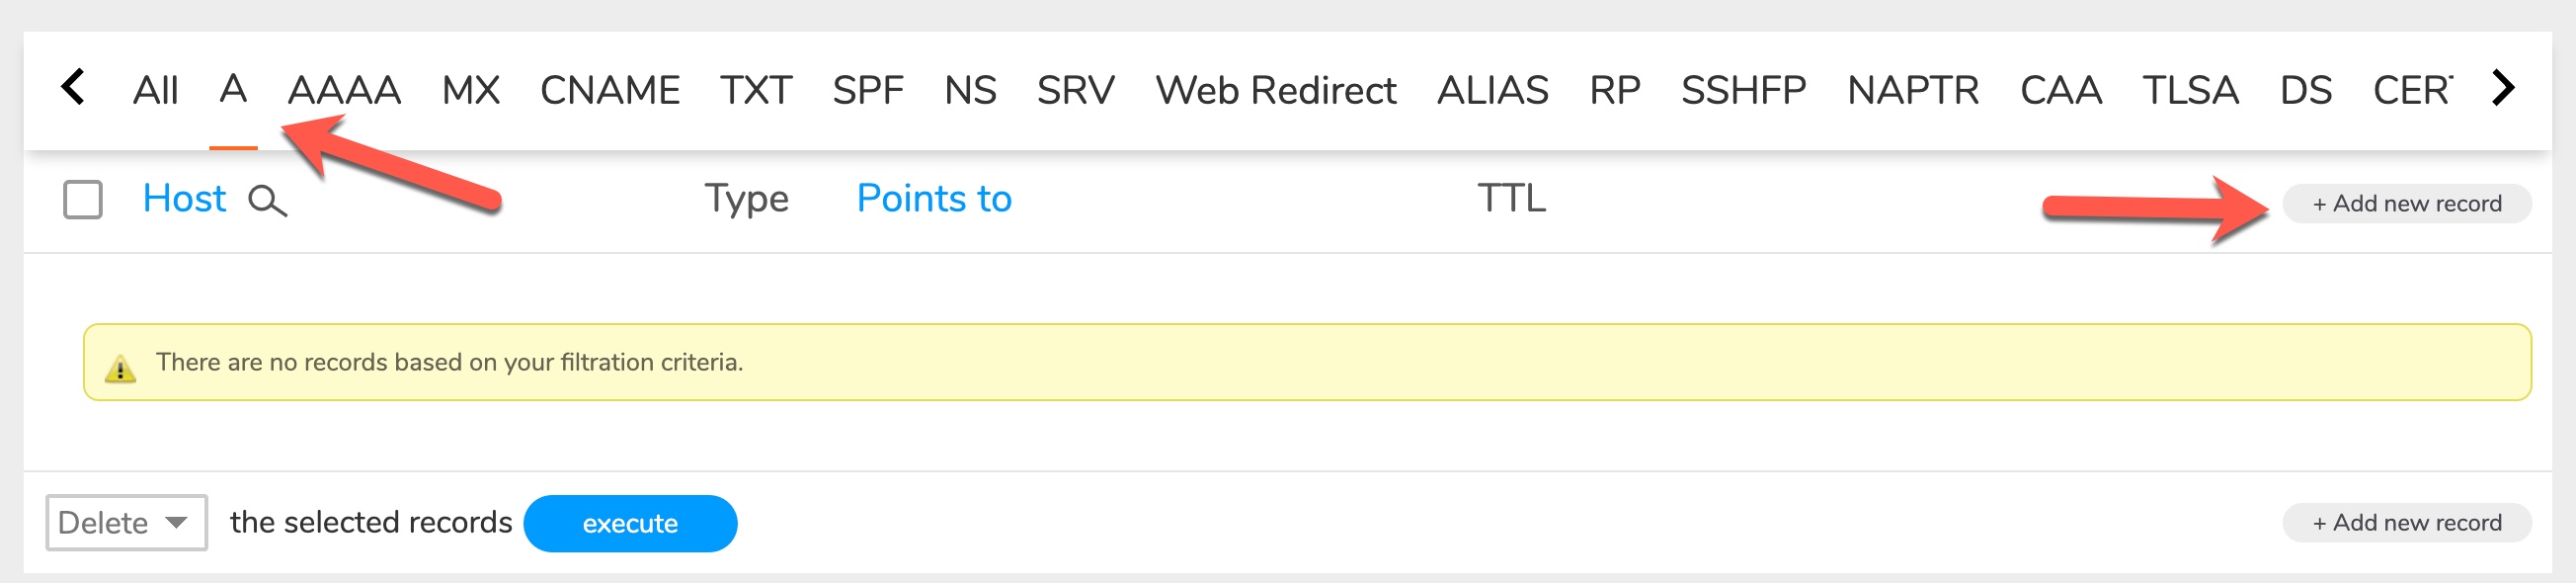
- Fill in the details that you received when you set up your server. Leave the TTL as the default setting seen in the image below.
Type: A
Name: yourdomain.com
Value: your_server_ip_address
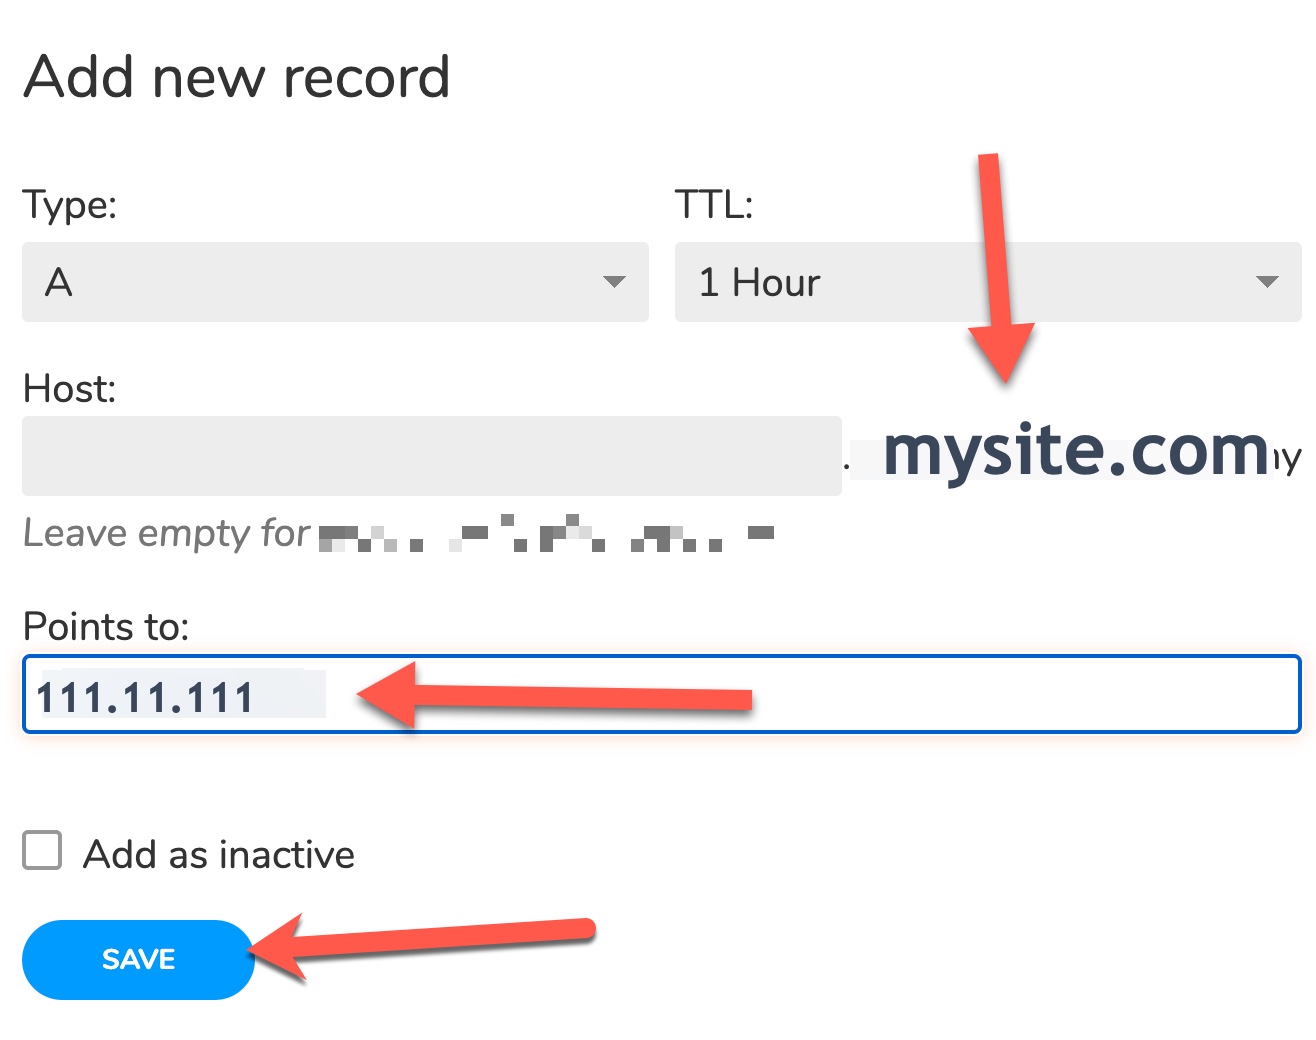
Note: You can also add the “www” A record by following the above. For Host, enter www in the Host input box, leave the TTL at default and add your server IP in the “Points to” input box.
Step Three (optional)
This step is only required if you are using our Email services like Premium Email or SMTP Services.
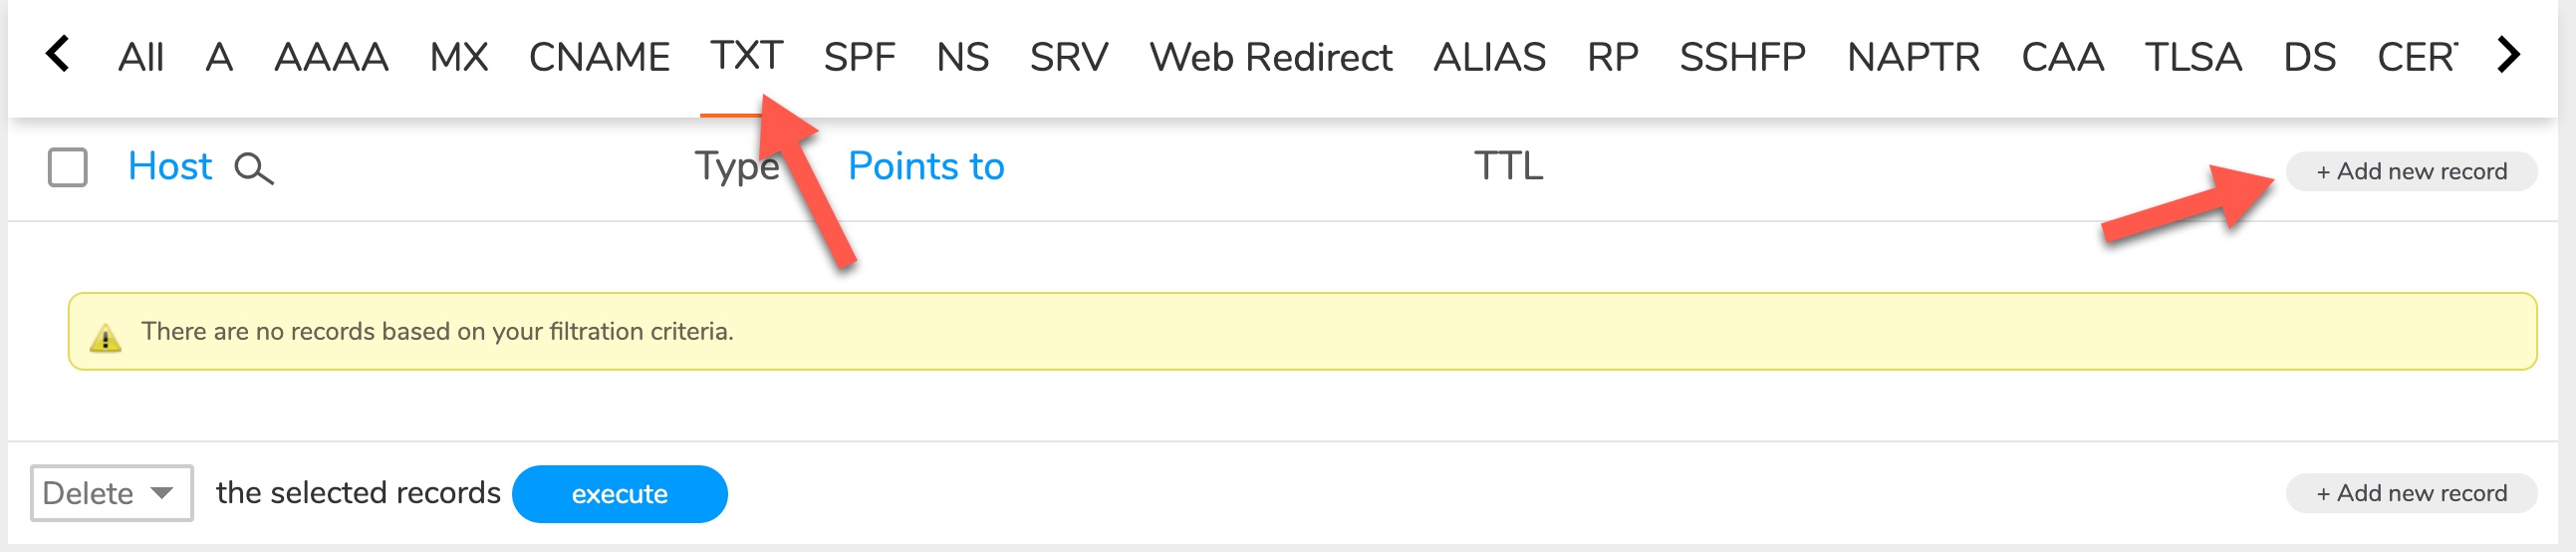
Add TXT Records (for SMTP)
- Choose TXT > Add New Record.
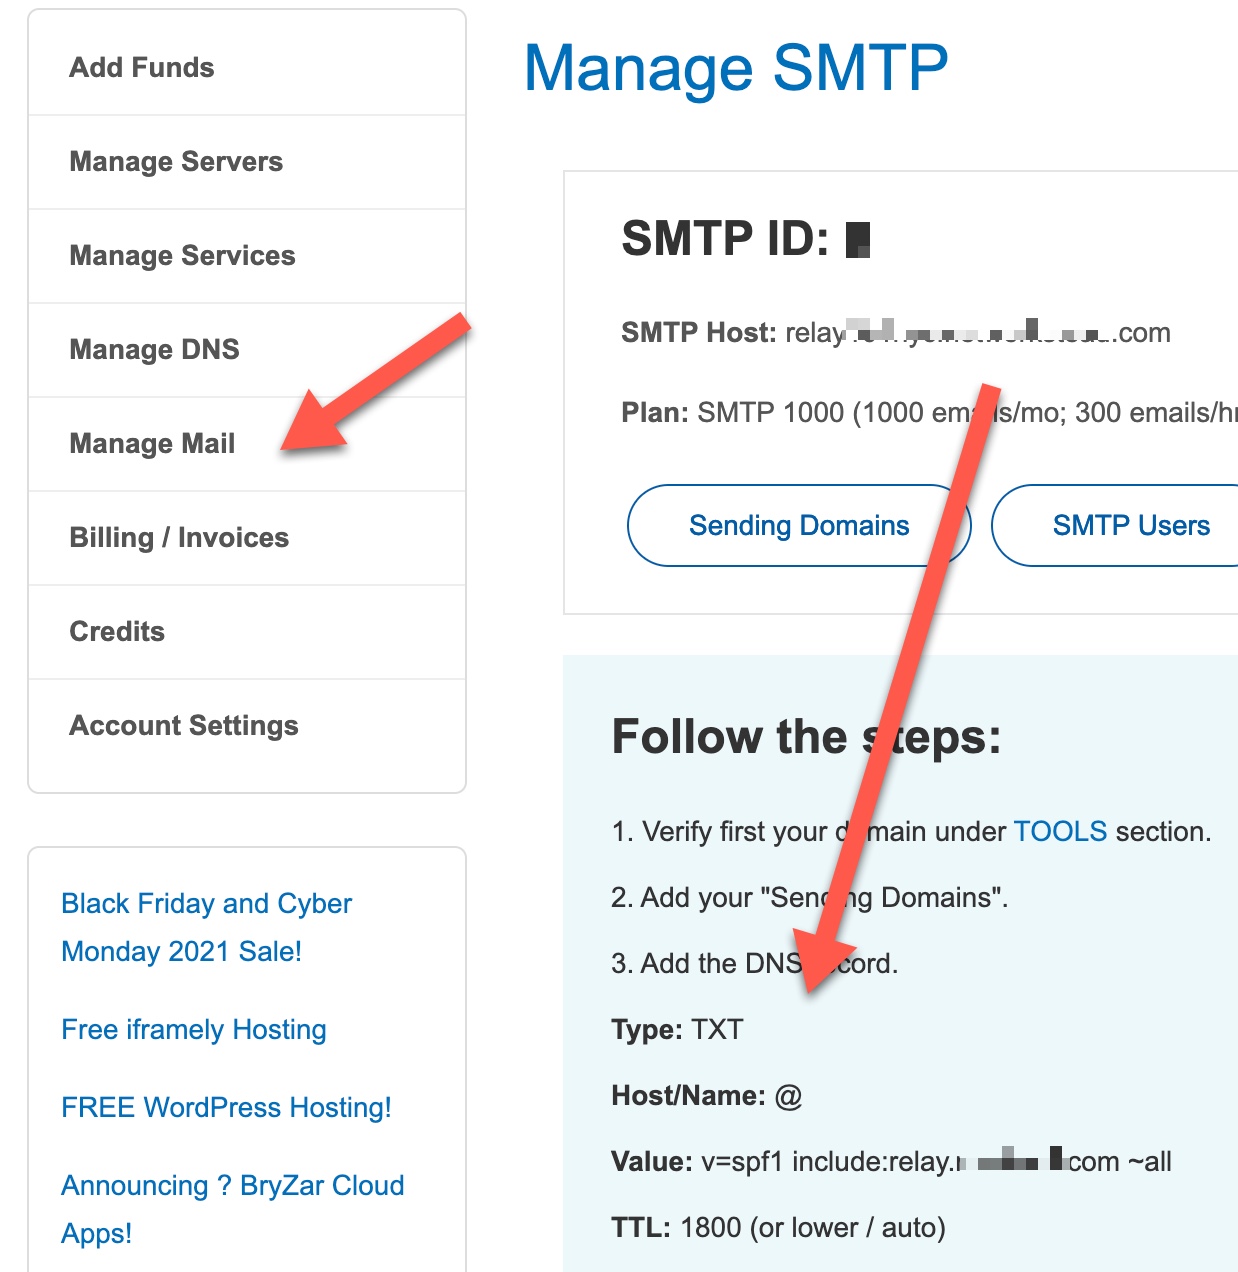
- Fill in the details that you received when you set up your SMTP server. You can find this info when logged in to the BryZar dashboard > Manage mail > SMTP Accounts. It will show at the bottom under “Follow these steps”.
- Leave the TTL as the default setting seen in the image below.

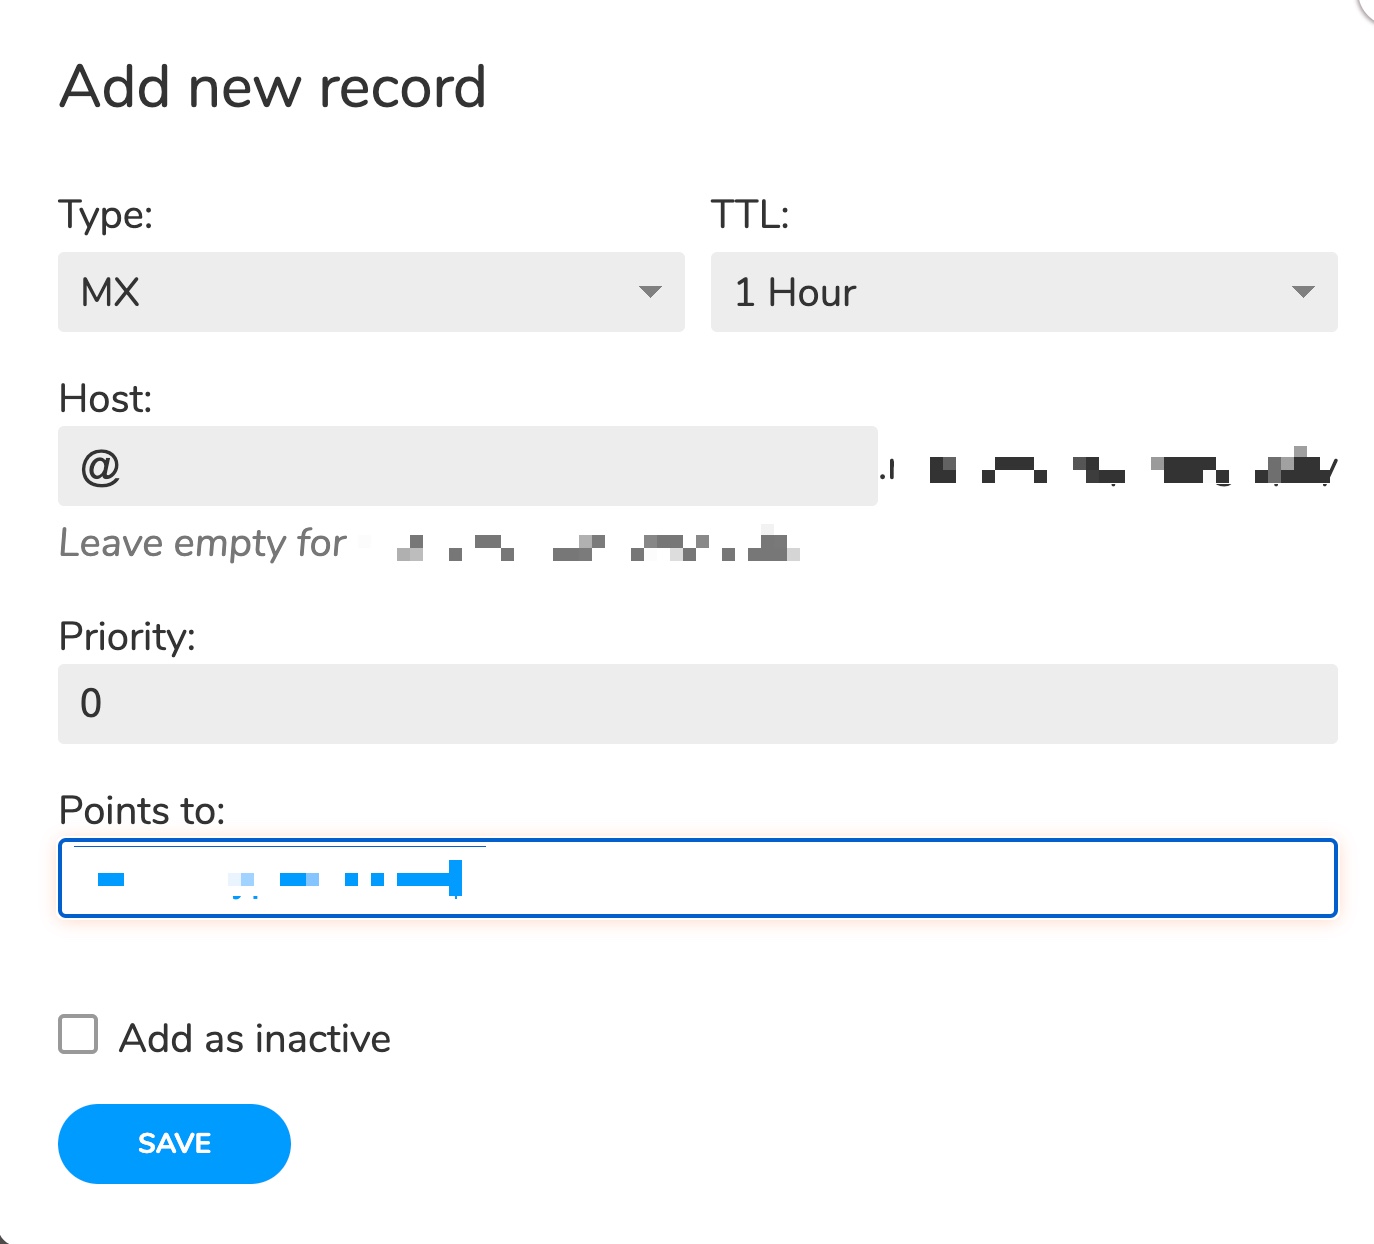
Add MX Records (for Email)
- Click “MX” when logged in to the DNS manager and viewing the records for the appropriate domain. Choose to Add New Record.
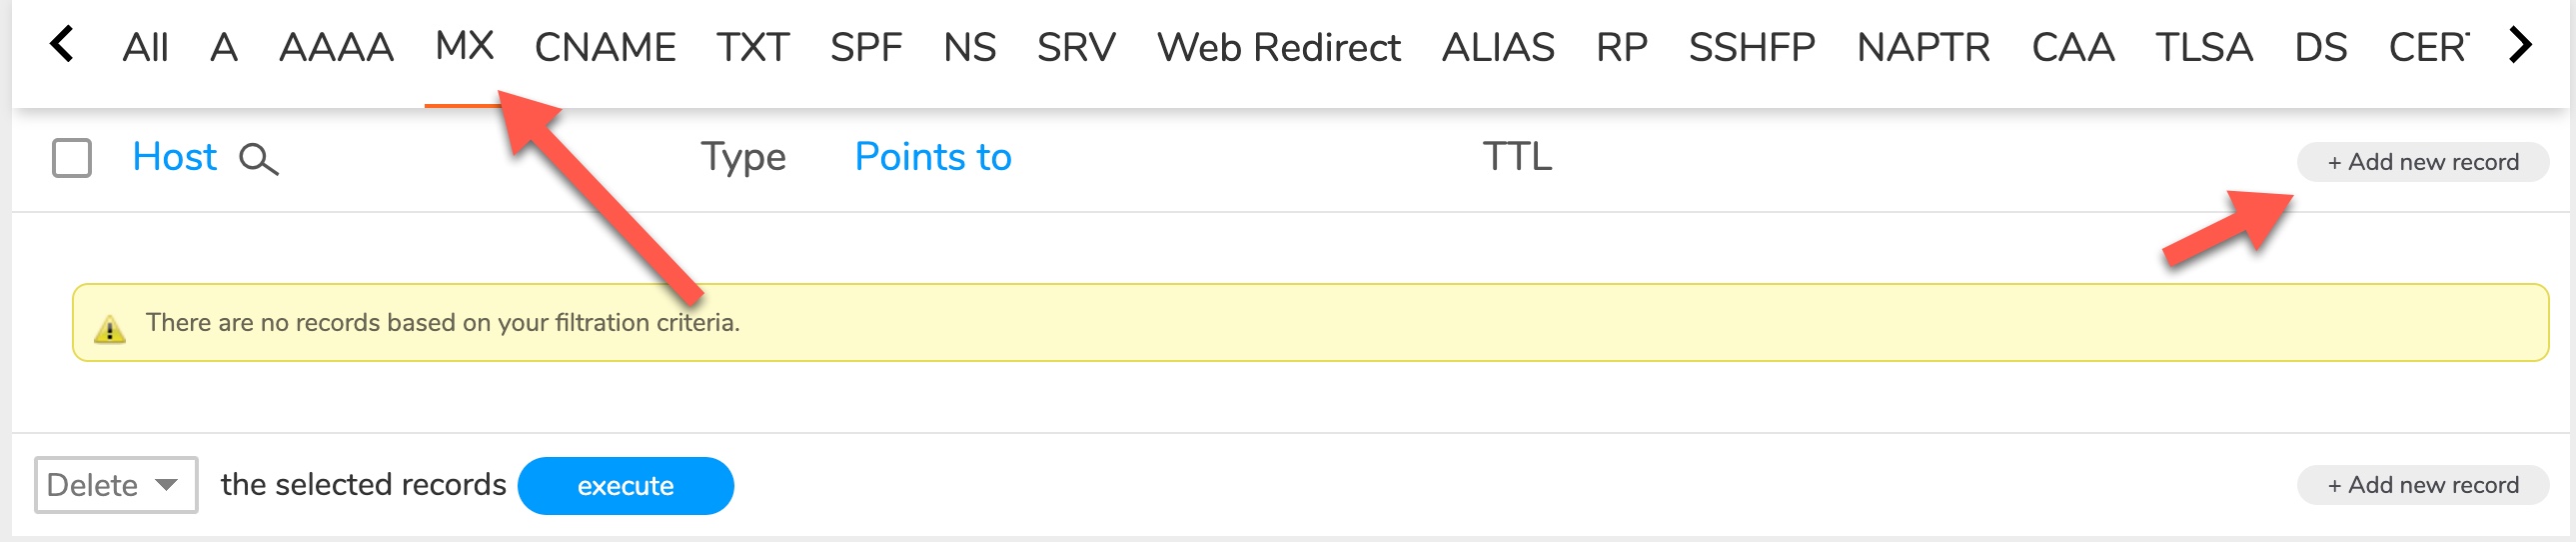
- Fill in the details that you received when you set up your Email. You’ll create two MX records.