If you want to create more email accounts, please follow these steps.
Creating Accounts Manually
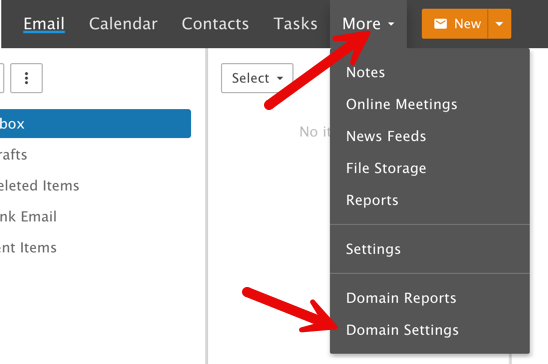
- Log in to your workspace (webmail) with your admin user.
- In the top menu, navigate to More > Domain Settings.
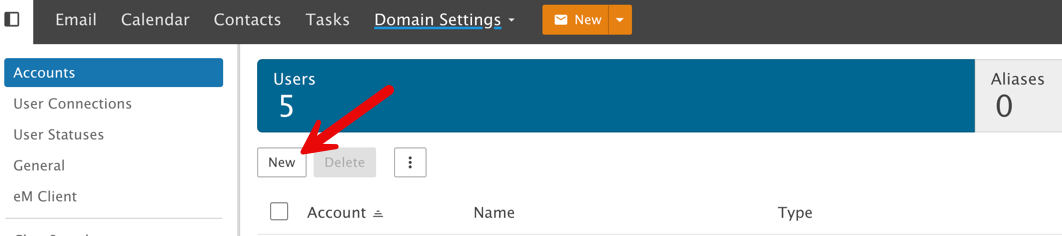
- Click the “New” button at the top of the middle column.
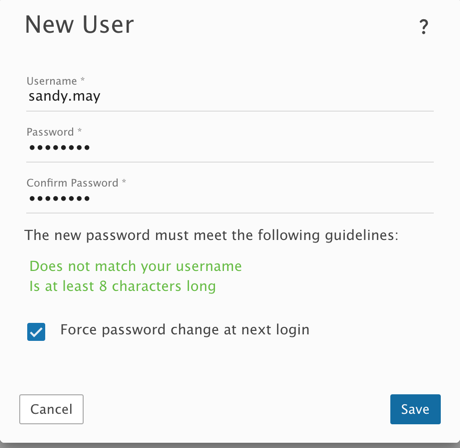
- Fill in the details in the popup:
- Username: this will be the user’s log in name. For example, if you want [email protected] you would put johnb as the username. Don’t fill in @yourdomain.com as that will automatically be created.
- Password: create a strong password, at least 8 digits long and not the user’s username.
- Force password change at next login: we recommend checking this box as it will be more secure if the user changes their password.
- Click Save to create this email account.
Once you’ve filled in all the details and saved it, you’ll be on a screen to manage this new email account. Set the settings as you want them, or leave them as is.
Importing Users
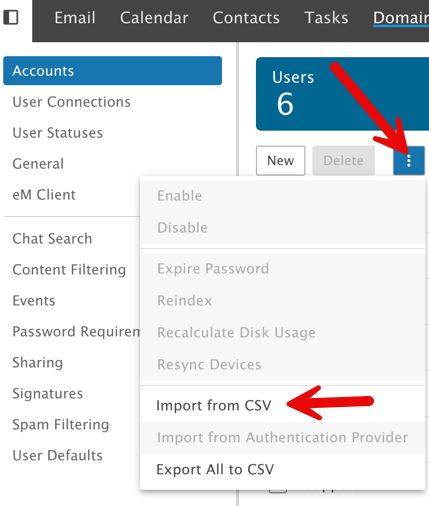
To add users via CSV import, click the Actions button and choose Import from CSV.
Upload the CSV file that contains the user information and click Next. The first page of the import modal will allow you to map the CSV column headers to the appropriate configuration option. For example, if your CSV contained a column header for “user name”, you can select the “Username” mapping.
At minimum, the CSV file must contain a “Username” column header. All remaining configuration options will mimic the domain’s User Defaults template. If no “Password” column header is provided in the CSV, the import modal will prompt you to create a temporary password for the user(s) being imported. Those users will be prompted to change their password the next time they log into the webmail interface.
If you have any questions about creating Emails (users) in the Business Email interface, please submit a support ticket and we’ll be happy to help.